


Numerous events have transpired over the last several weeks within the Ethereum ecosystem, so many that it may prove challenging for a casual onlooker to fully grasp our current position and the resources accessible. Thus, I wish to utilize my initial post here to provide you with a summary of the tools we’ve developed and how you can leverage them to create intriguing projects at this very moment.
Before we proceed, a brief introduction: I am Alex Van de Sande, serving as the head designer at the Ethereum foundation. During DevconOne, I delivered a presentation titled “The Blockchain Versus The Average User”, where I elaborated on the hurdles of making the Ethereum ecosystem accessible to the so-called “Average User,” a key challenge being the difficulty in defining precisely what that term signifies. When personal computers emerged, they were marketed as a solution “for the rest of us”, yet the “rest of us” demographic they aimed at was actually a fairly narrow audience interested primarily in word processing, spreadsheets, and desktop publishing. Today, those individuals would be regarded as among the foremost tech enthusiasts, just below those who continue to debate the merits of Vim versus emacs. I sincerely believe that one day your Candy-crush-playing grandma/grandpa will utilize the blockchain, much as today they use databases and https connections without even being aware of it (perhaps when they convert blue diamonds acquired in one game into cows in another game produced by a different publisher). However, for the present, my focus is on reaching that next group of users: those who can download an office suite and navigate a spreadsheet yet do not feel at ease with command lines.
If you identify with that category, then welcome! We will guide you through some fundamental tasks you can execute within a few minutes on Ethereum: Create your own cryptocurrency, establish your own democracy and set up a central bank on the blockchain. We have bypassed the “Hello World” tutorial this time, but you’ll manage just fine.
Obtain the Ethereum Wallet
Acquire the latest version of the Wallet
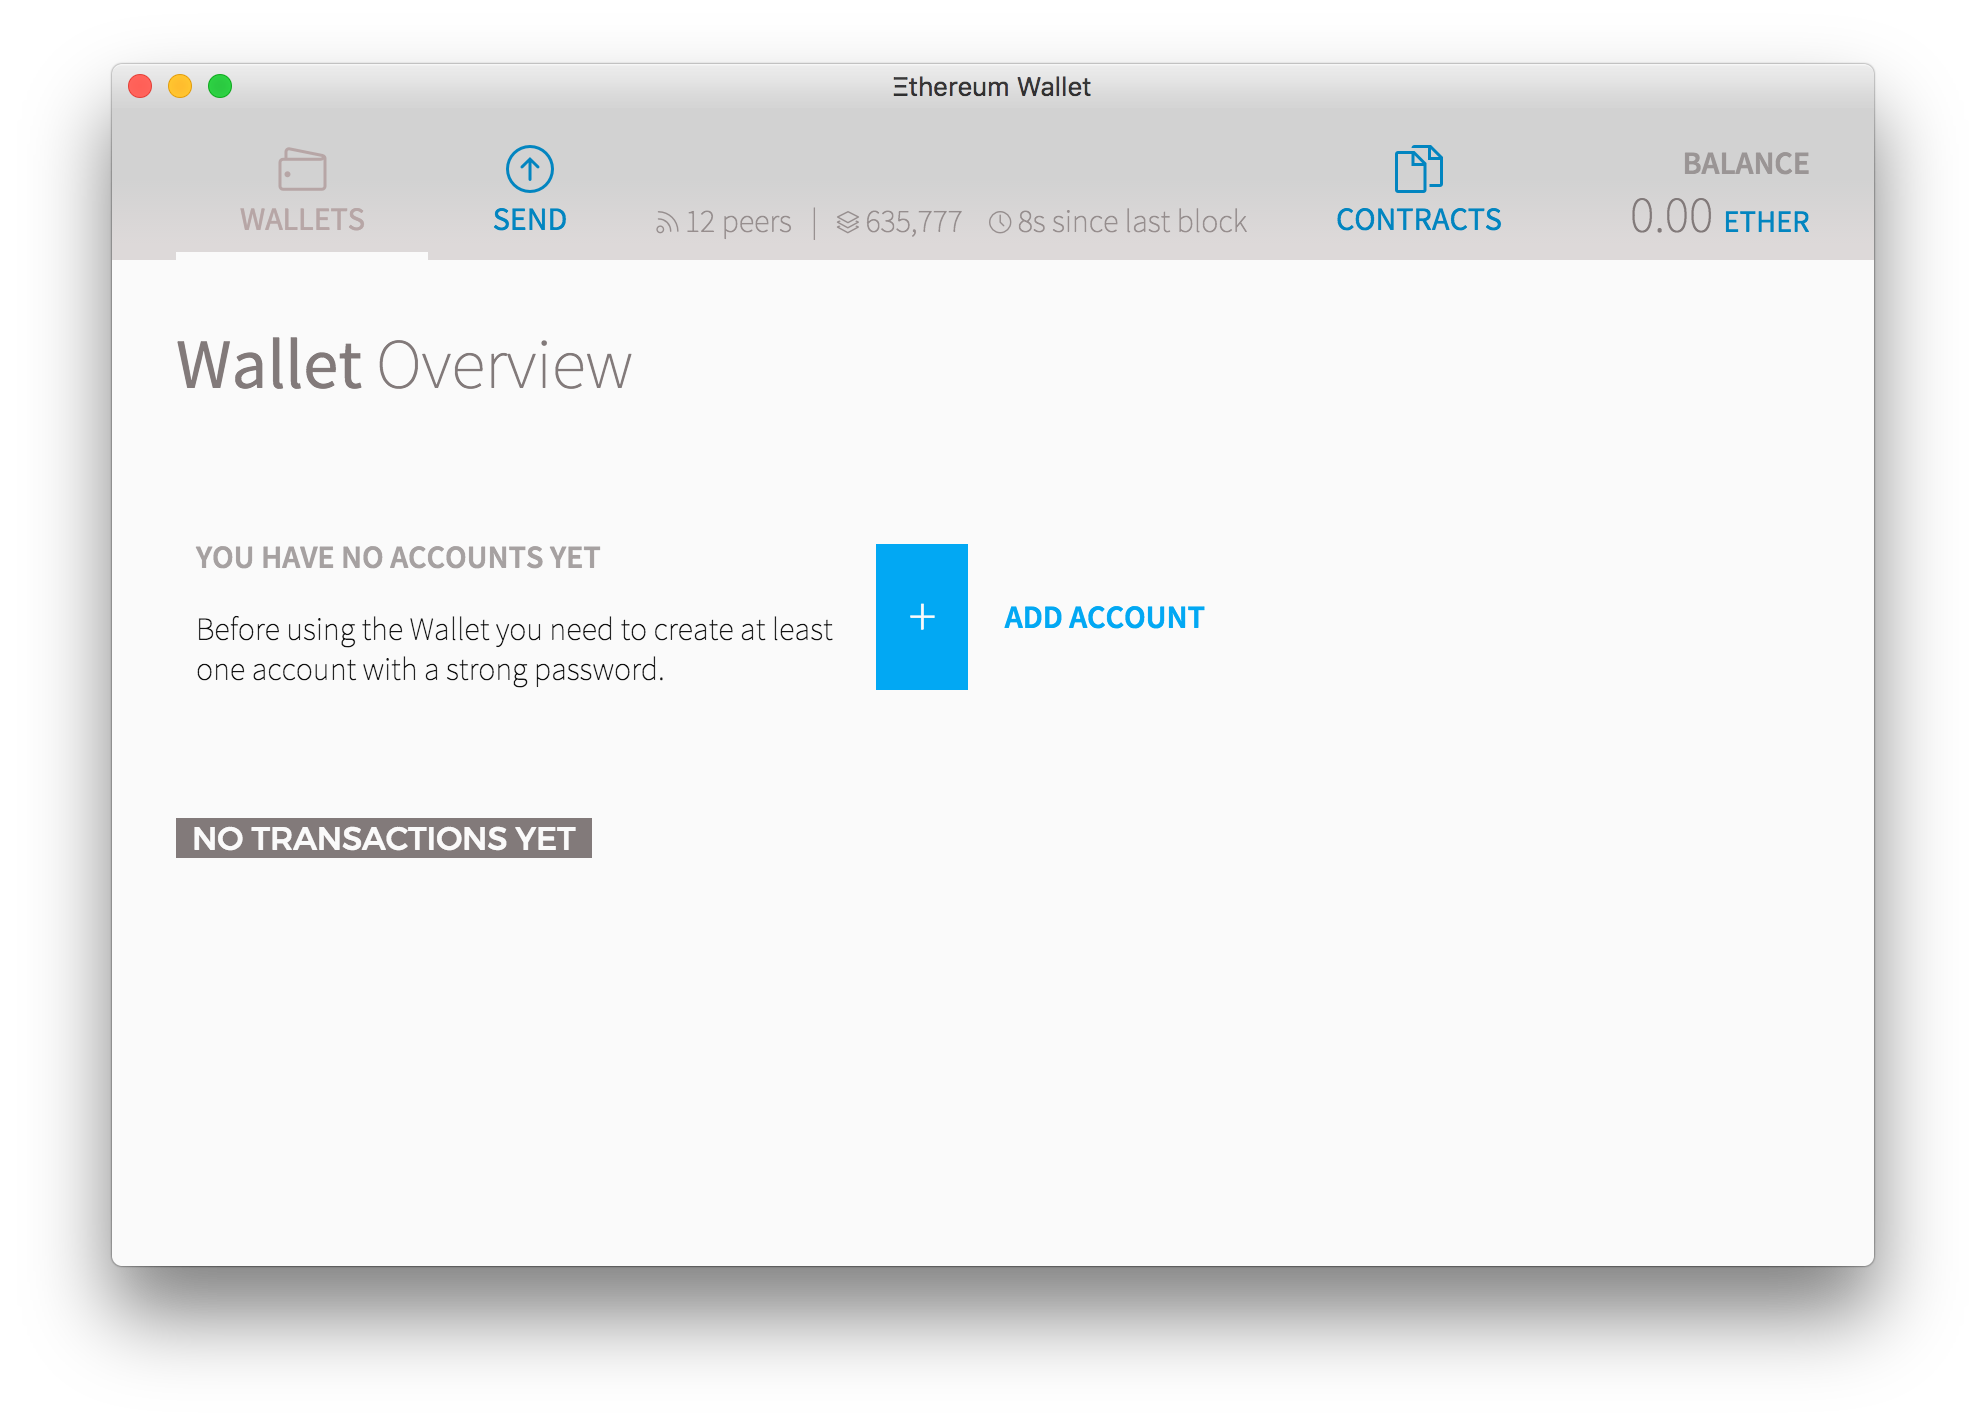
Enough discussion, let’s delve into Ethereum! I might be partial, but I believe the ideal starting point is the Ethereum Wallet, a multi-platform application that will enable you to send ether and Ethereum-based currencies, along with creating and executing contracts.
The first task you’ll need to accomplish is setting up an Ethereum account. All that you require is a robust password and you’ll obtain it. To perform any actions, you’ll need to fund your account with some ether: however, don’t fret; you won’t need much. Most contracts here will cost less than a tenth of a US penny. If you are only experimenting, we advise you to switch to the testnet: navigate to the menu develop > network > testnet (morden) and then to develop > start mining. After a few minutes, you’ll likely have enough ether to experiment, allowing you to turn it off and conserve your computer’s resources.
The wallet permits only basic mining on the testnet, but if you wish to try your hand at the real network, you will need a more sophisticated tool. This was previously a cumbersome process, but there are now more efficient tools available: and we have newly developed tools that will significantly streamline that process.

The AlethOne miner is a user-friendly tool featuring two buttons: click one to initiate mining using your GPU and click the other to deposit your earnings into a wallet. Download it from the Turbo Suite, a collection of powerful tools developed by the C++ team to build Ethereum applications.
If you aim to create smart contracts on the live network and cannot mine, you will require some ethers. You can request a friend to send you some or you may exchange it for bitcoins on a cryptoexchange. For bitcoin enthusiasts, we suggest you keep an eye on the btcrelay project, a fraud-resistant sidechain that will be launching soon, facilitating quick exchanges between ether and bitcoin without requiring a third party.
Develop a token
The initial contract we will craft is a token. Tokens within the Ethereum ecosystem can represent any fungible tradable asset: currencies, loyalty points, gold certificates, promissory notes, in-game items, etc. Since all tokens implement certain basic features in a standardized manner, your token will instantly be compatible with the Ethereum wallet and any other client or contract that adheres to the same standards.
Proceed to the contracts page and then click “deploy new contract”.
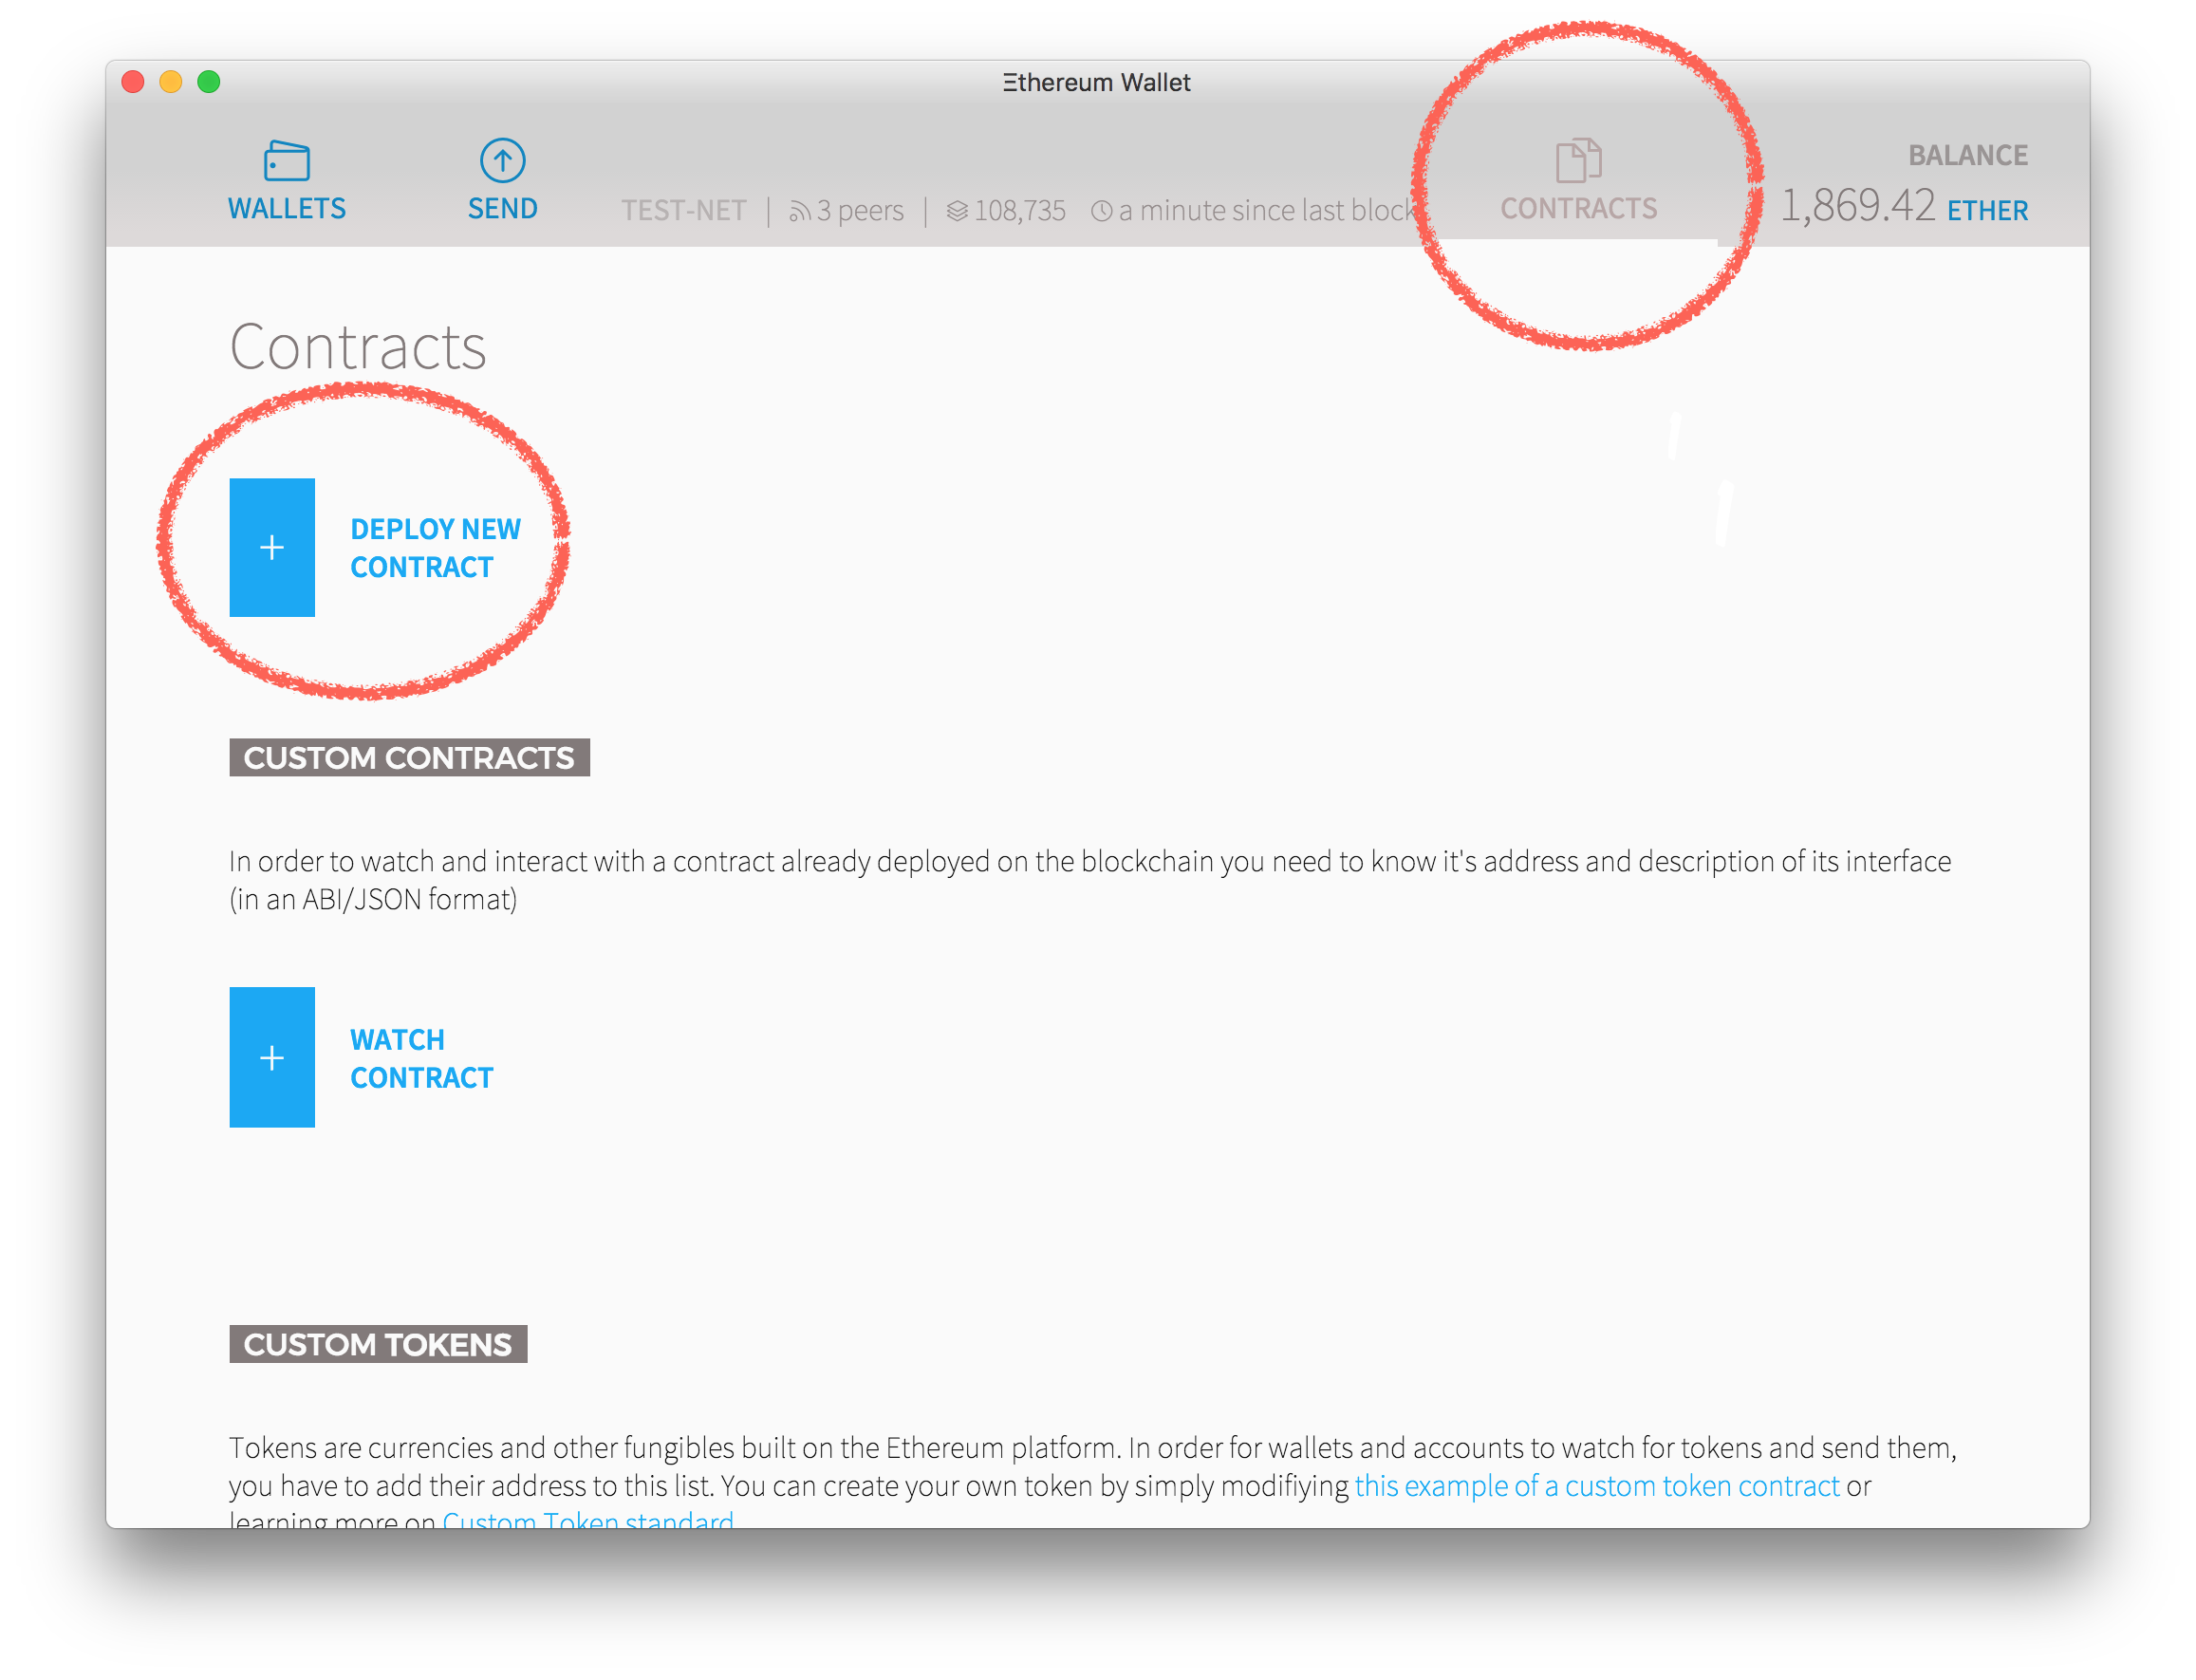
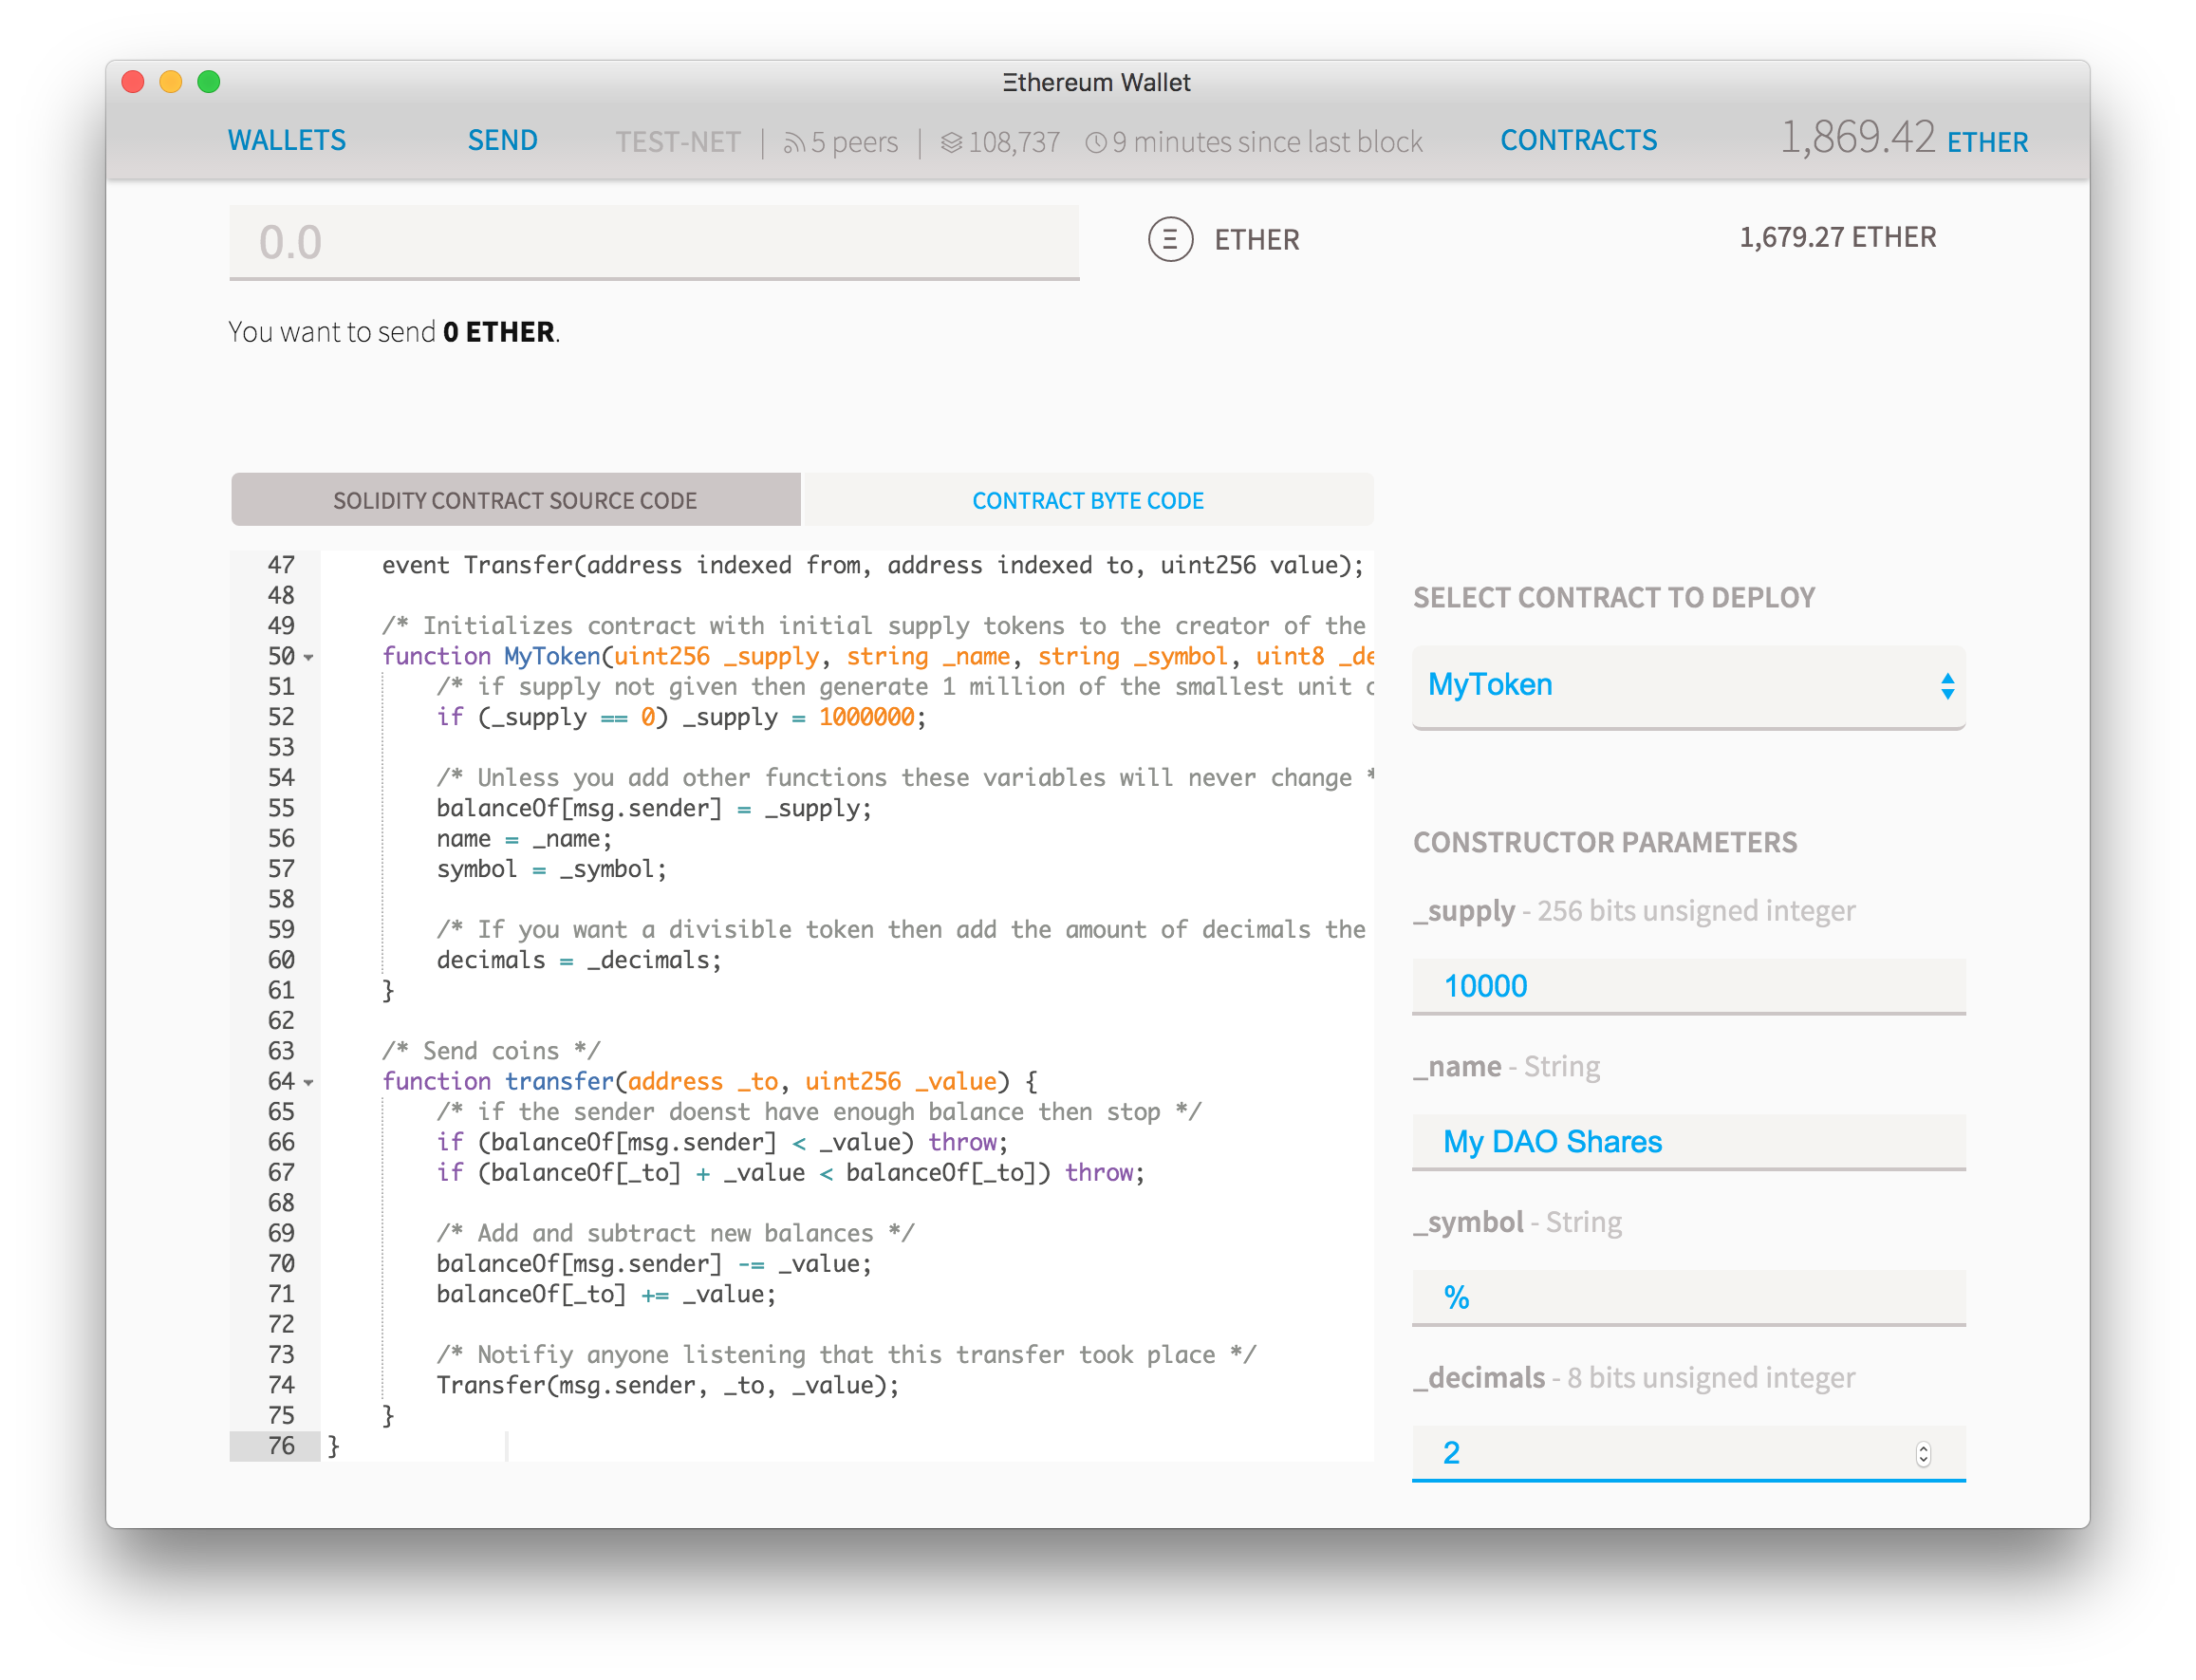
Now obtain the token code from this link and insert it into the “Solidity source field”. If the code compiles successfully without any errors, you should notice a “pick a contract” dropdown on the left. Select it and find the “MyToken” contract. In the right column, you will see all the parameters required to customize your token. You have the freedom to modify them as you wish, but for the sake of this tutorial, we recommend choosing these parameters: 10,000 for the supply, any name of your choice, “%” as a symbol, and 2 decimal places. Your application should resemble this:
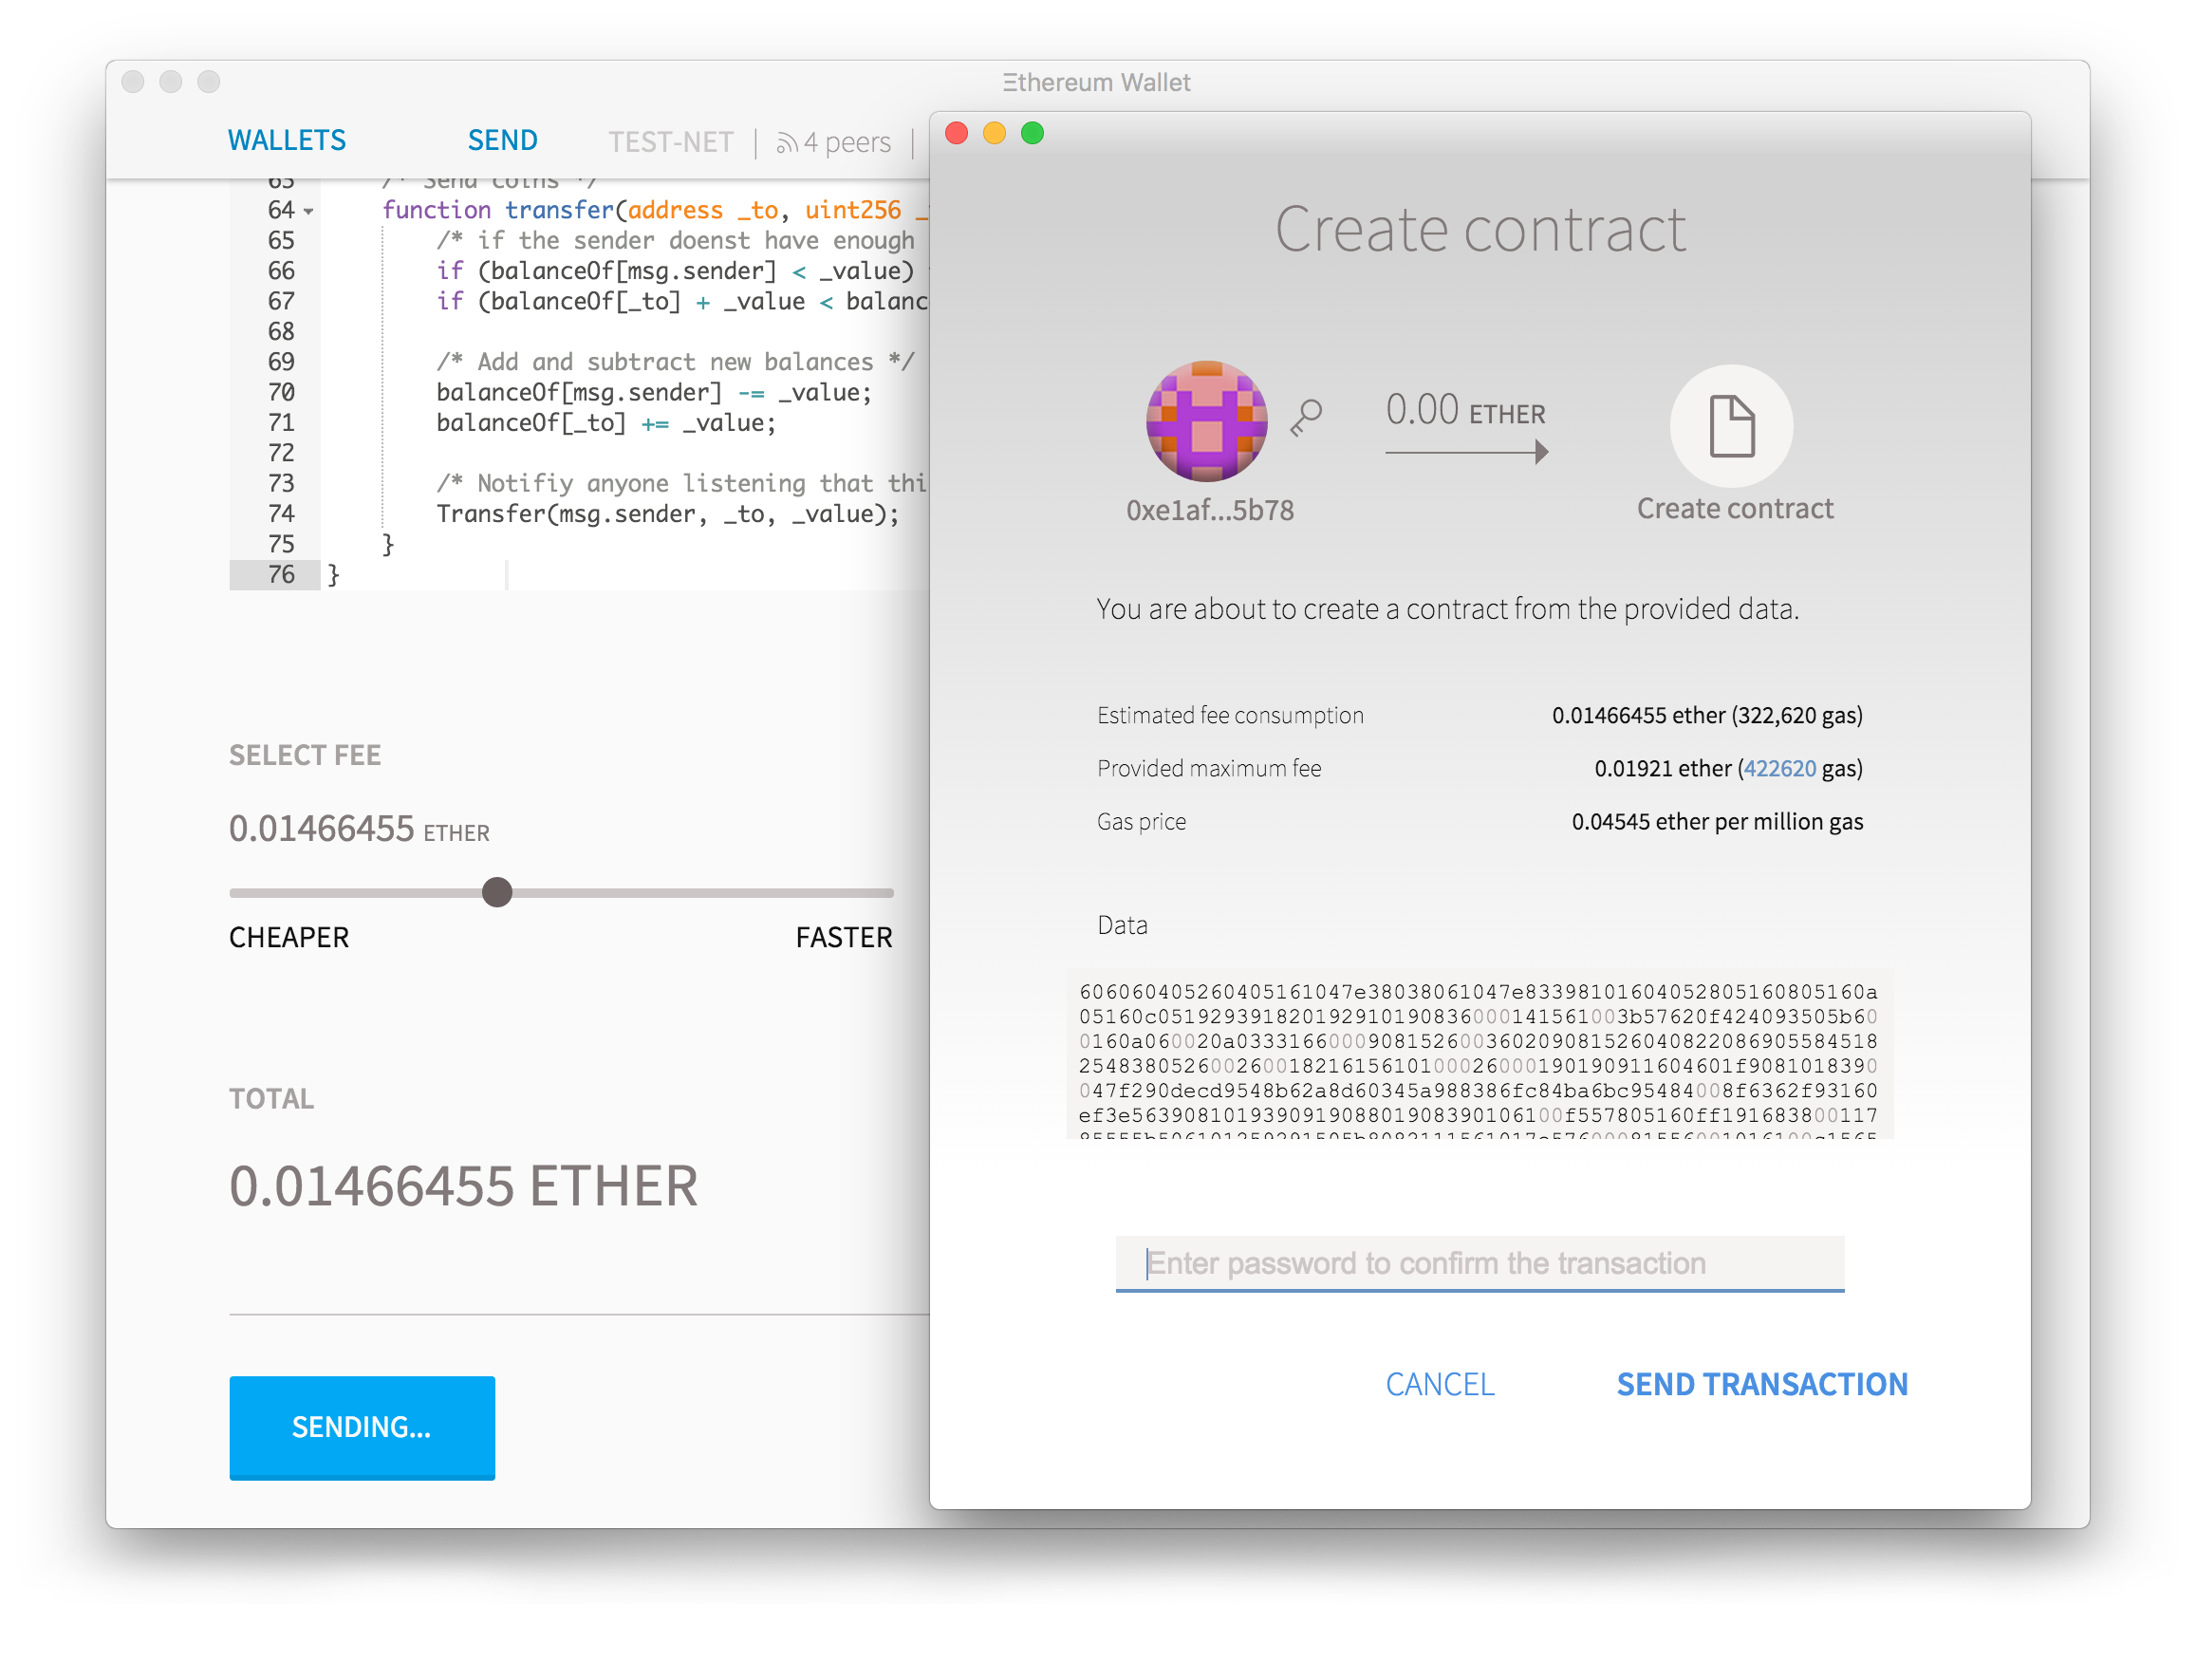
Navigate to the bottom of the page and you’ll find an approximation of the computational expense for that contract, along with an option to select a fee for how much ether you are prepared to pay for it. Any surplus ether that you do not utilize will be credited back to you, allowing you to keep the default selections if preferred. Hit “deploy”, enter your account password, and wait briefly for your transaction to be recognized.
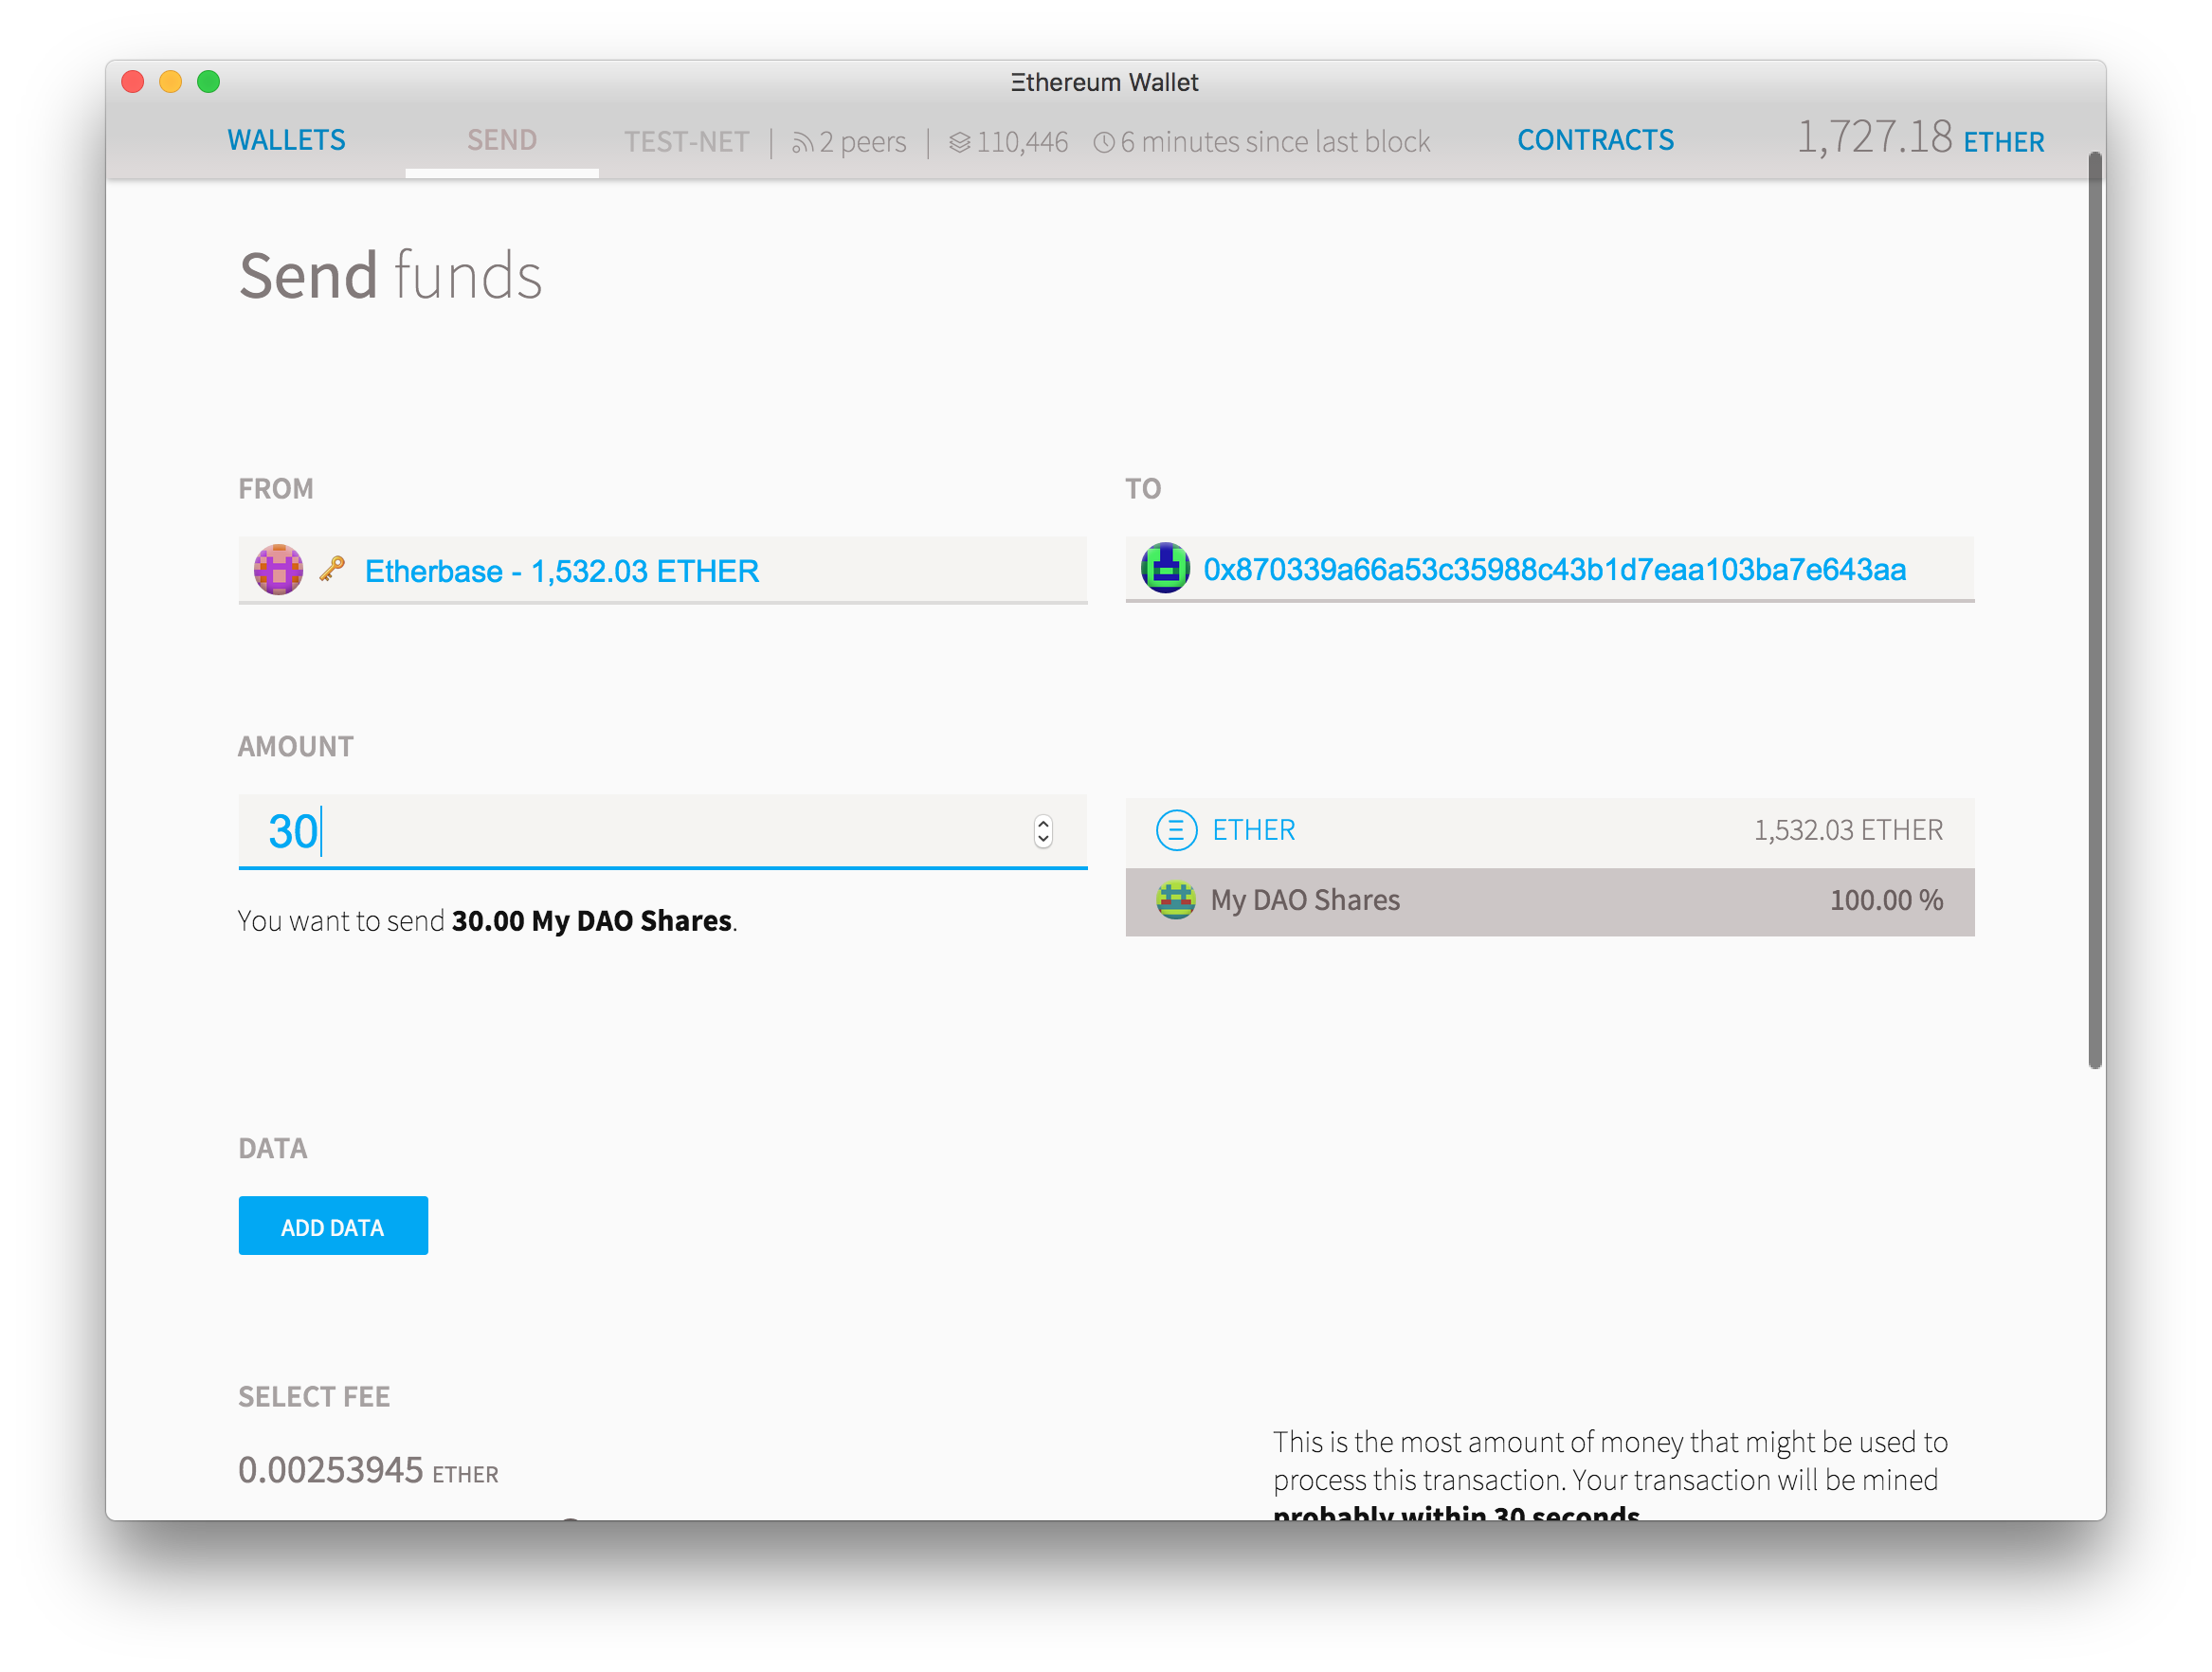
You will be directed to the main page where you’ll observe your transaction awaiting confirmations. Select the account labeled “Etherbase” (your primary account) and after approximately a minute, you should find that your account indicates you possess 100% of the shares you have just generated. To transfer some to a few friends, choose “send”, then decide which currency you would like to transmit (ether or your newly minted shares), insert your friend’s address in the “to” field, and click “send”.

If you send it to a friend, they will not immediately notice anything in their wallet. This occurs because the wallet only monitors tokens it recognizes, and you must manually include these. Now head to the “Contracts” tab and you should find a link for your recently created contract. Click on it to visit its page. Given that this is a straightforward contract page, there isn’t much to do here—simply click “copy address” and paste the contract address into a text editor, as you will need it soon.
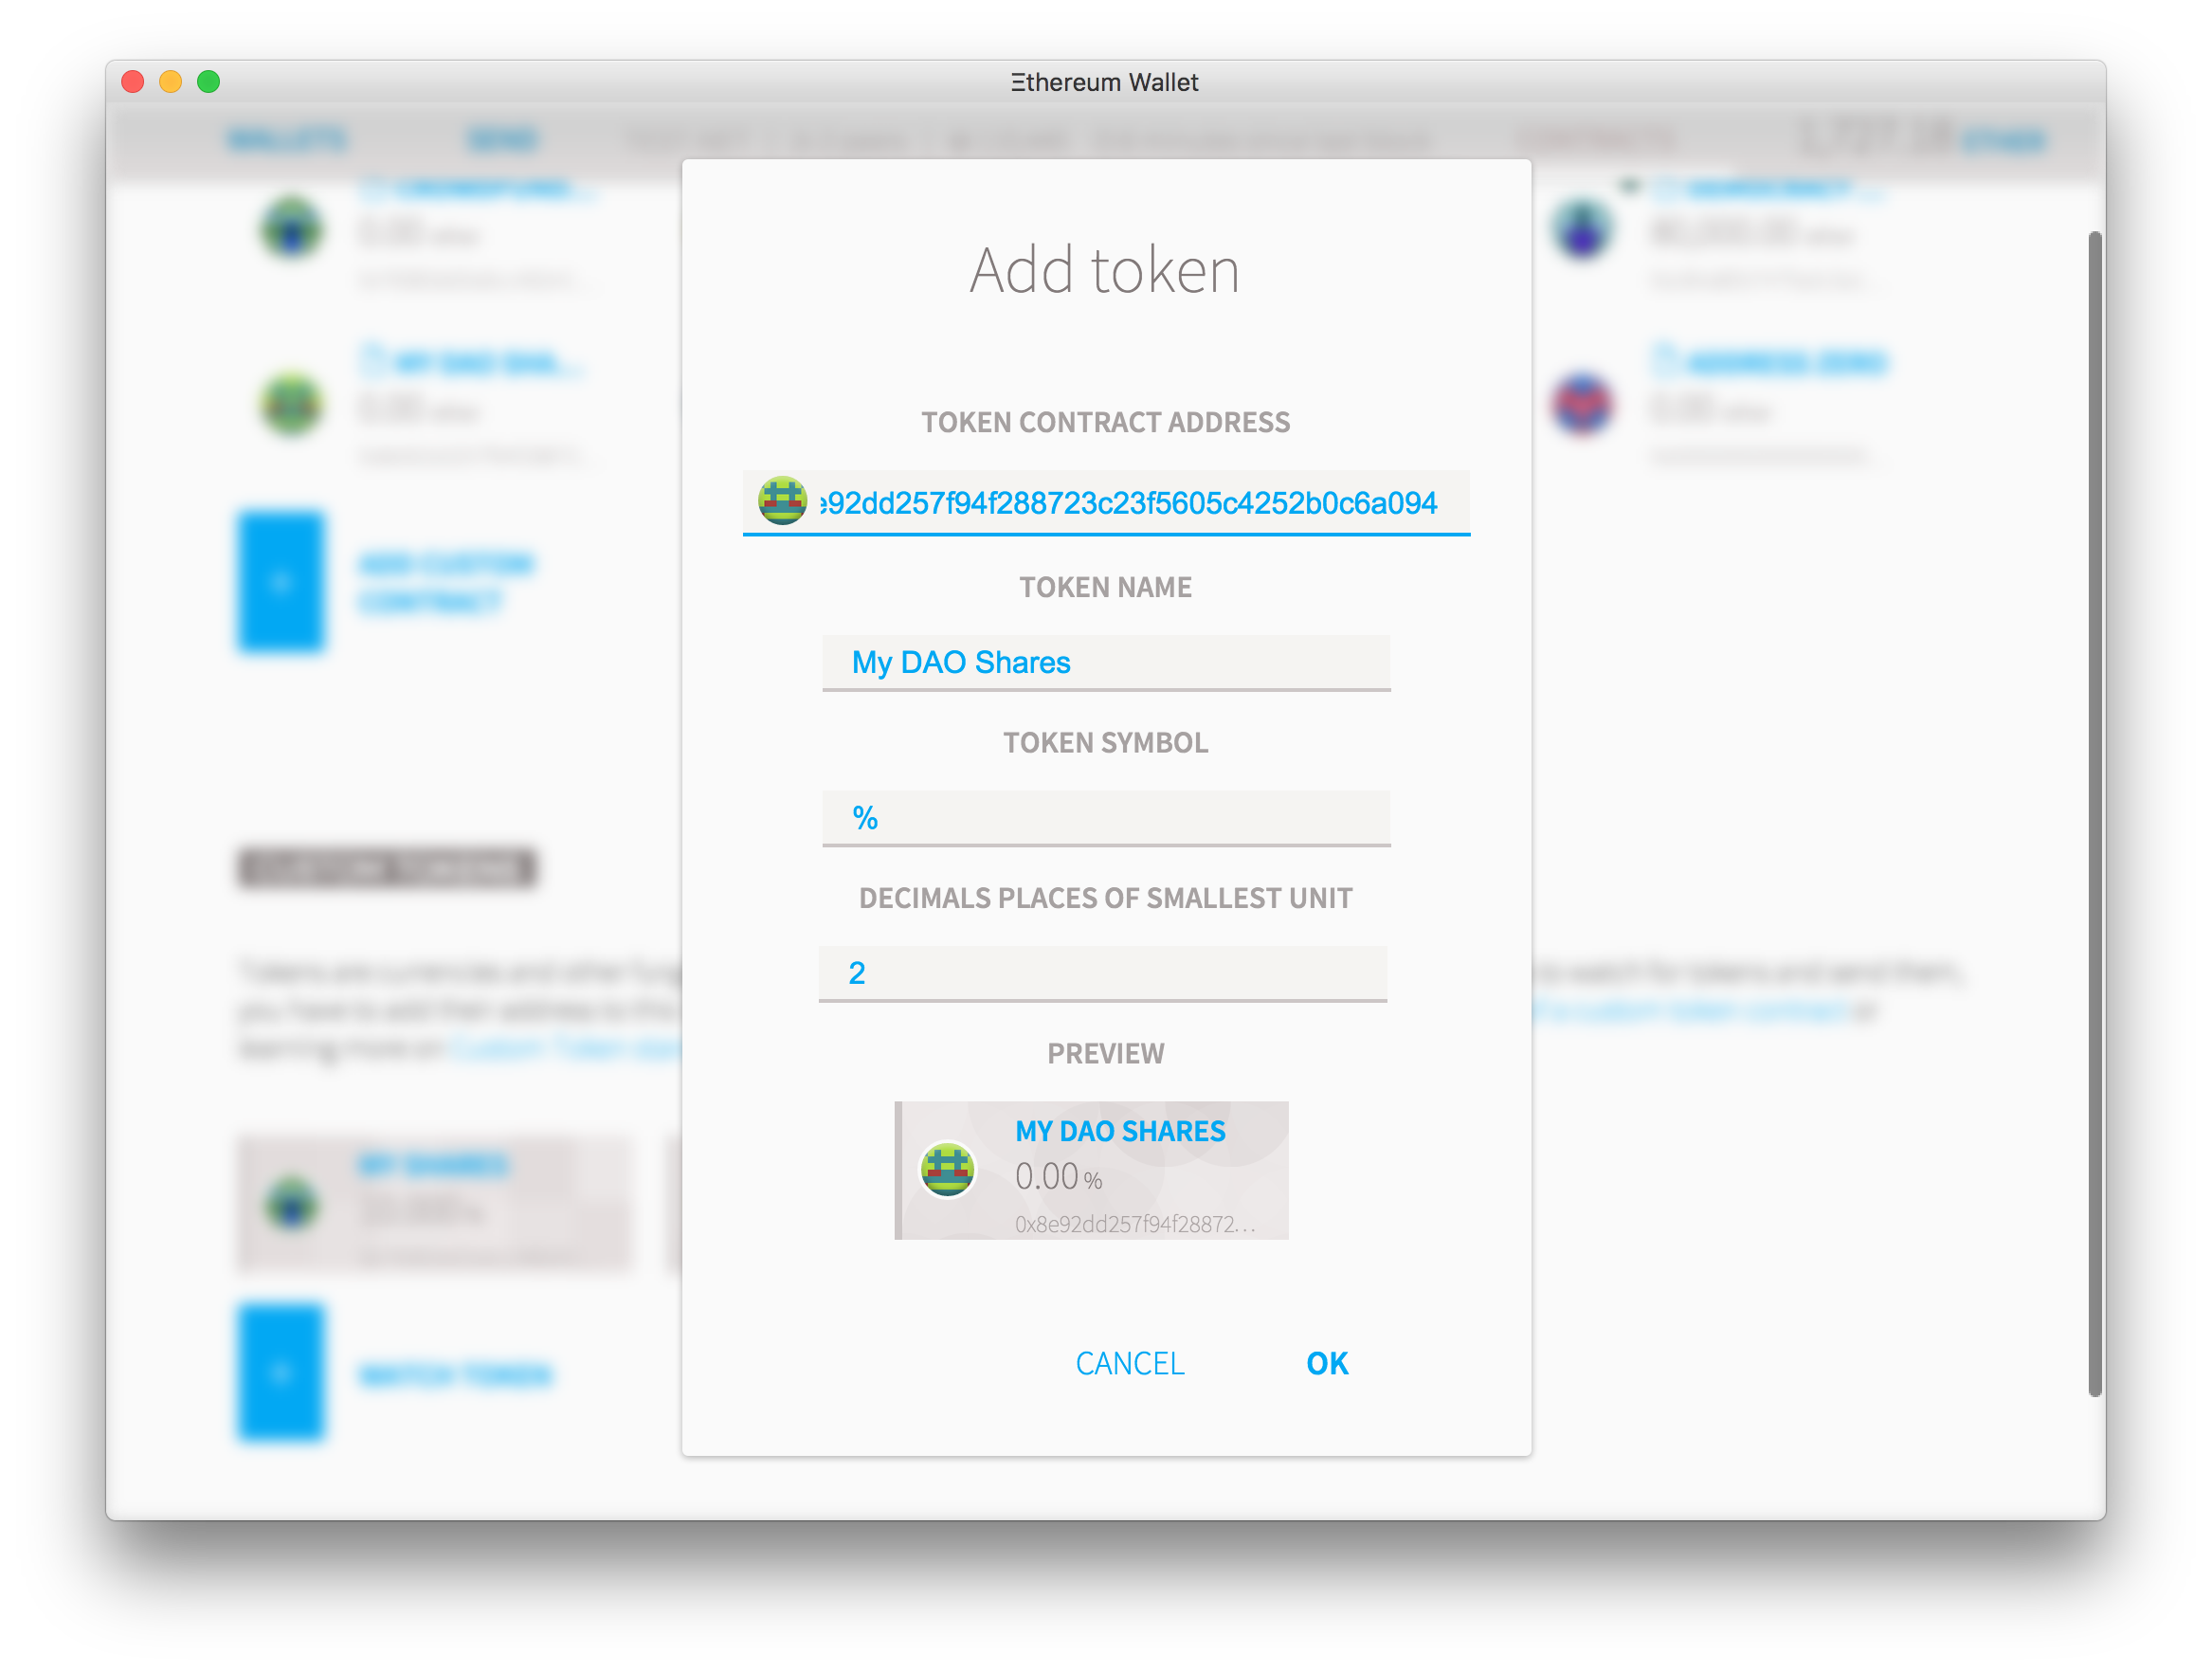
To include a token to monitor, go to the contracts page and then click “Watch Token”. A popup will appear, and you only need to paste the contract address. The token’s name, symbol, and decimal value should be filled in automatically, but if not, you can enter any designation you prefer (it will solely influence how it appears in your wallet). Once you’ve completed this step, any balance you hold of that token will automatically be displayed, and you’ll have the ability to send it to others.
And now you’ve created your own cryptocurrency token! Tokens can be valuable as means of value exchange within local communities, methods to record hours worked, or for various loyalty schemes. But can we establish a currency with intrinsic value by making it practical? Tomorrow, we will demonstrate how tokens can function as a voting mechanism to facilitate collective decision-making regarding fund usage by creating a Democratic Autonomous Organization.